To set up the integration of your quizzes with Bitrix24 CRM, go to the "Integrations" section of the desired quiz and edit it. Find the "Bitrix24" module in the list of integrations and click the "Configure" button:

Next, you need to install the QuizLead app on your Bitrix24 portal. To do this, follow this link and follow the instructions.
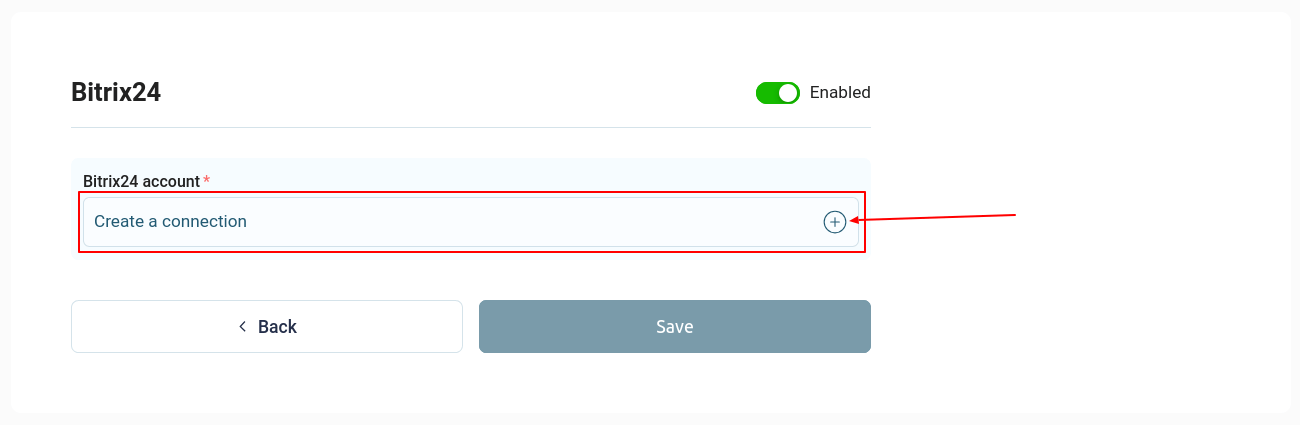
Once the QuizLead app is installed on your portal, you need to set up a connection to your Bitrix24 account. To do this, click the "Create Connection" button:
Next, enter the name of your connection and the link to your Bitrix24 portal:
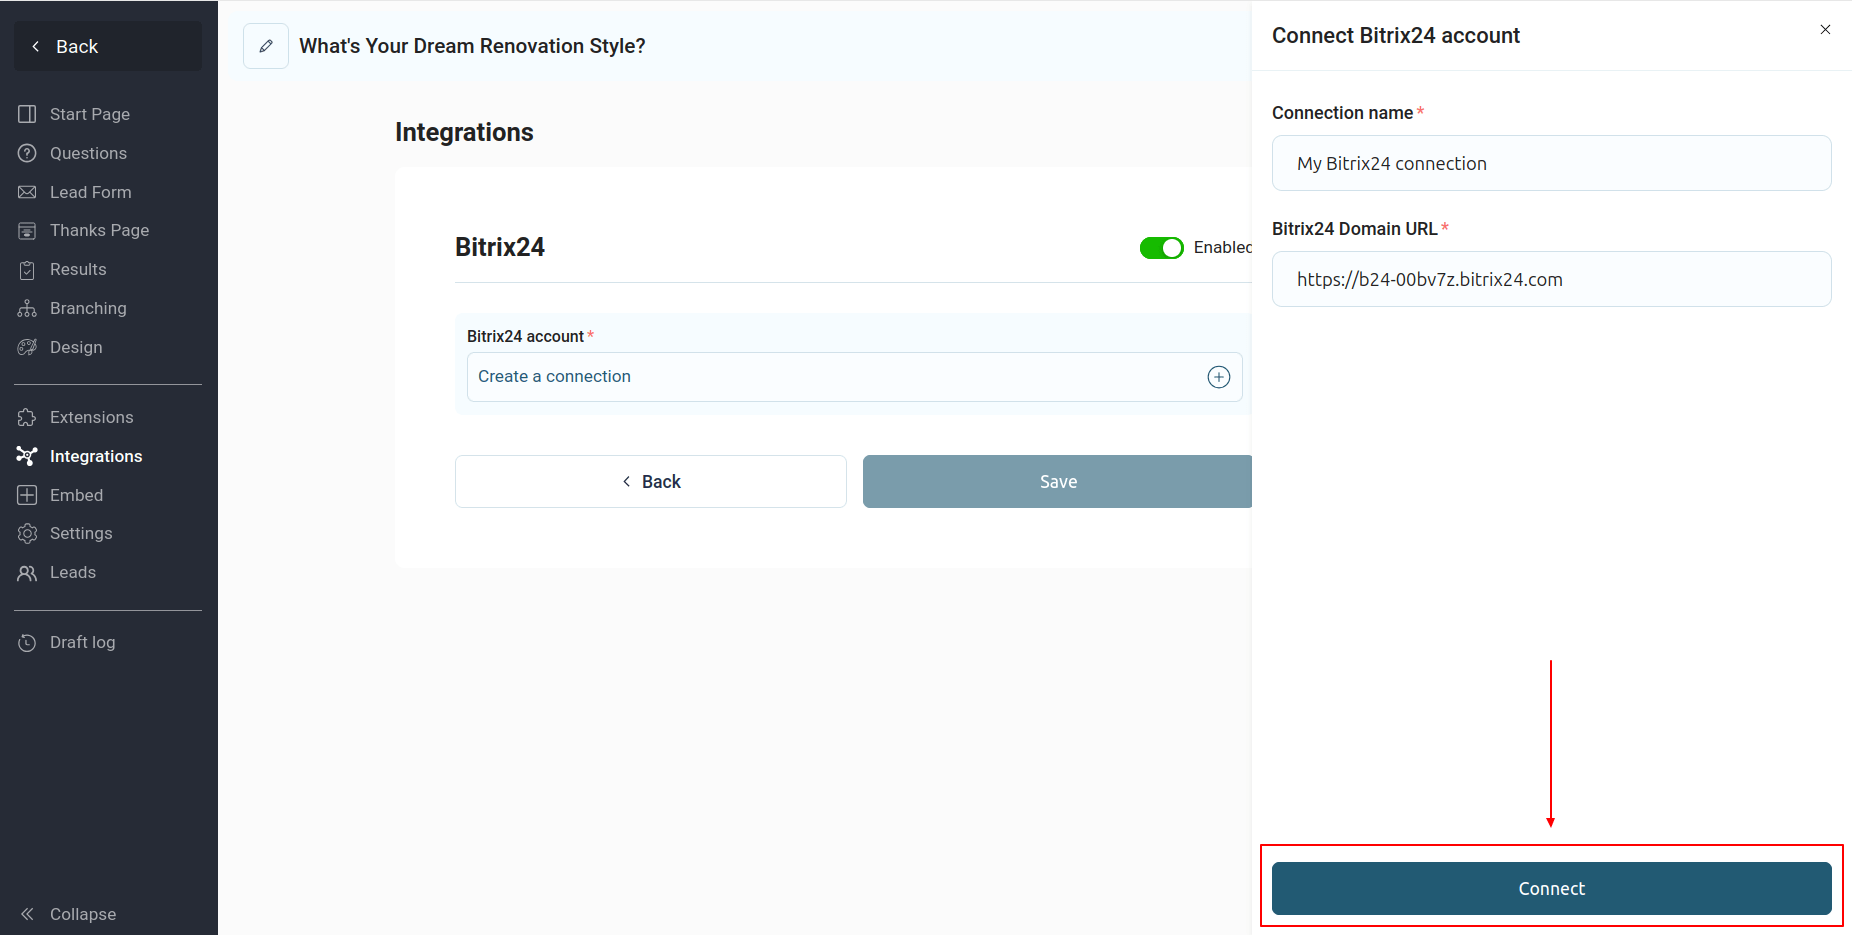
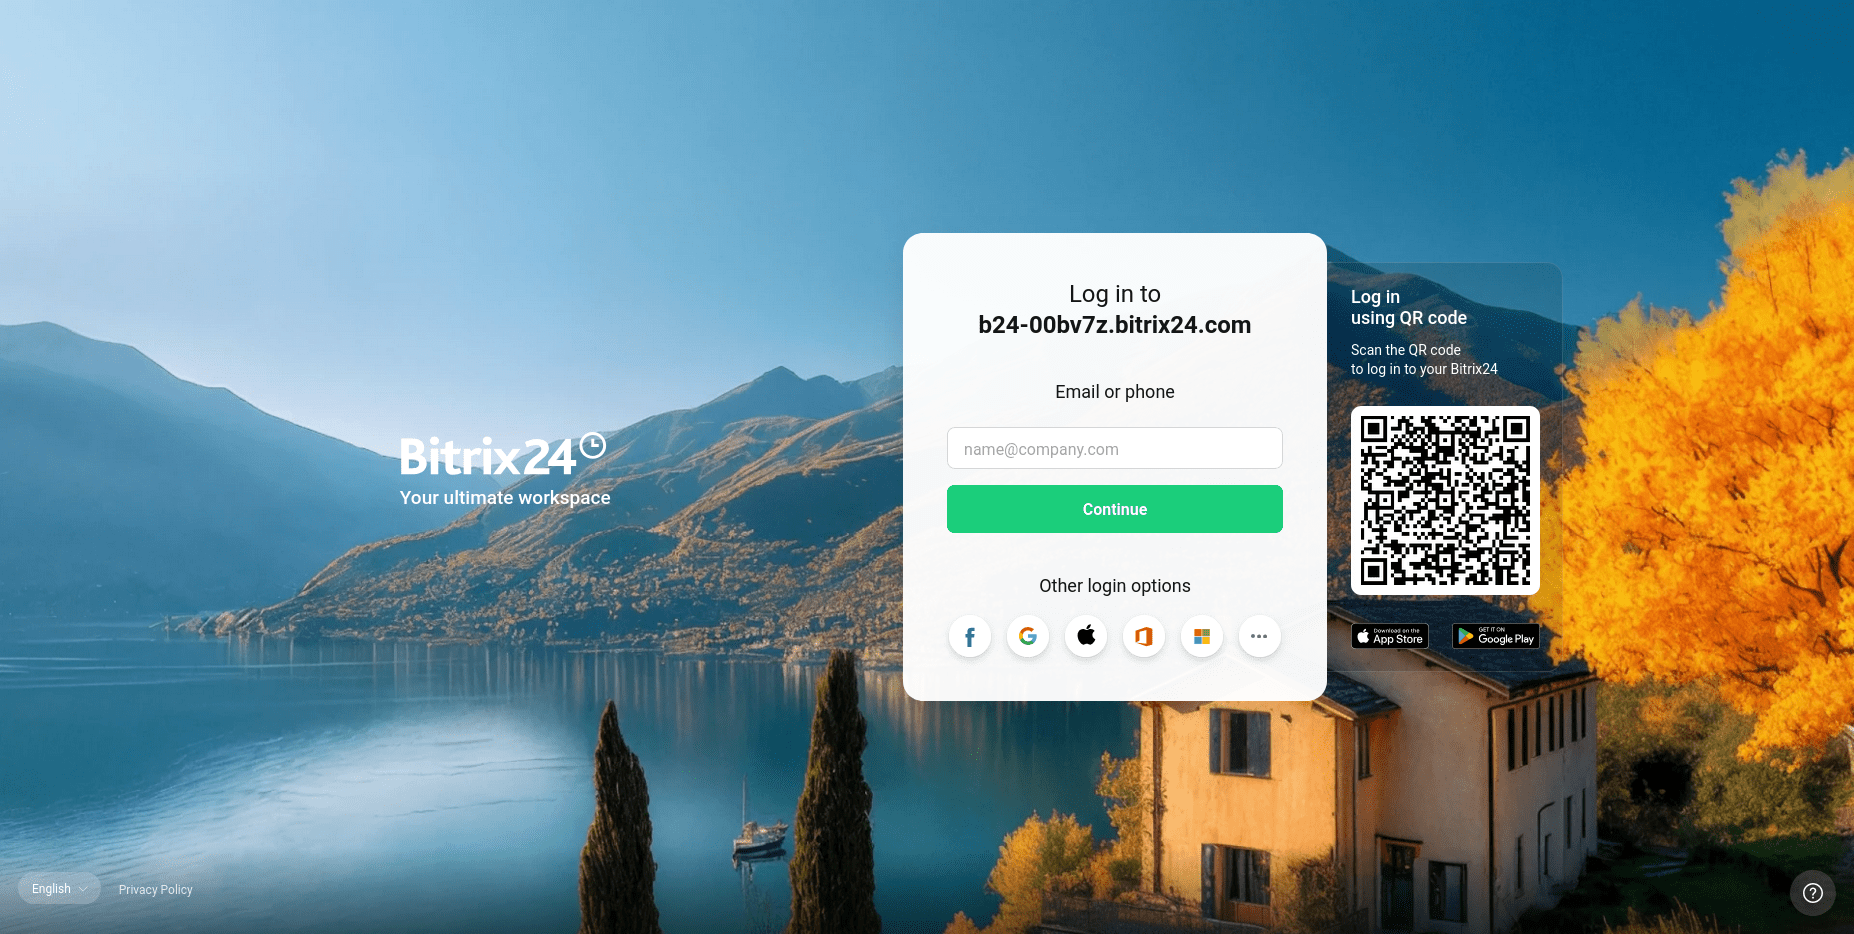
Click the "Connect" button, which will open a new tab and redirect you to the Bitrix24 website. Log in to your account and grant the necessary permissions to our application:
Once the necessary permissions have been obtained, the main integration options will become available to you:
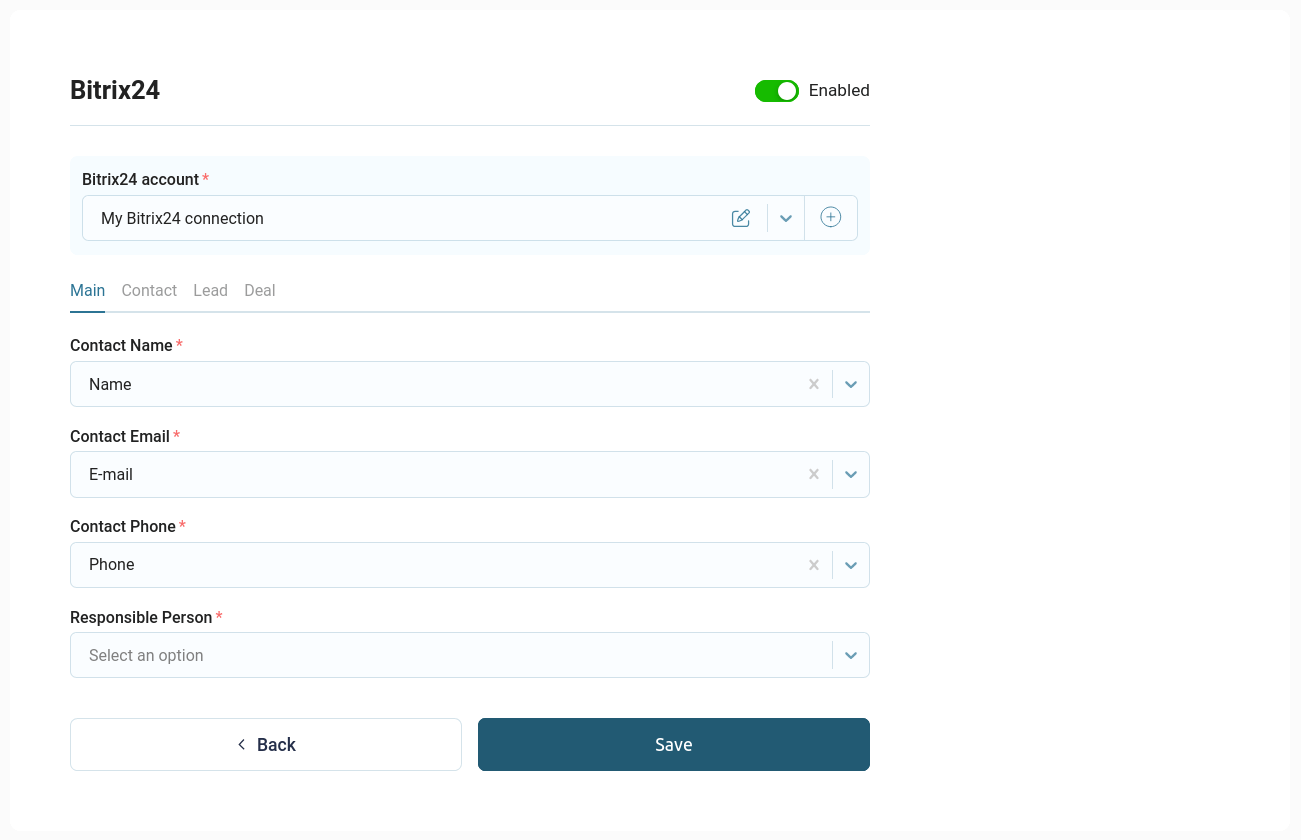
This integration contains 4 sections:
- The main thing
- Contact
- Lead
- Deal
In the main settings, you need to select the responsible user, and also configure the basic contact parameters: name, email, and phone number.
Contact details
In the "Contact" section, you can configure other contact settings, as well as choose whether or not to create a separate contact when transferring data:
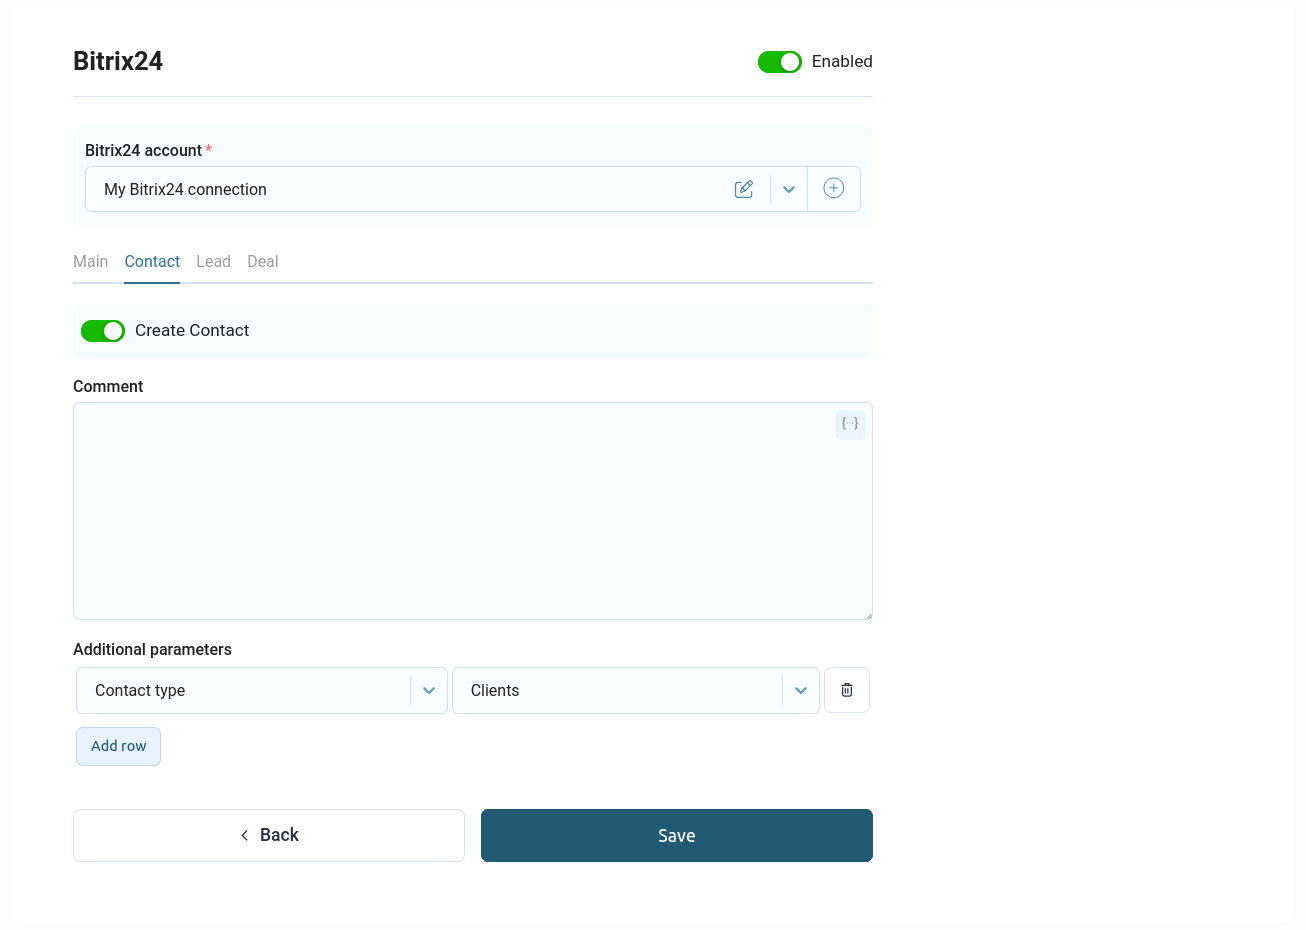
In the list of additional parameters, you can configure all available contact fields that you have in your CRM.
Lead generation
If you need to create a lead, go to the "Lead" section and activate the corresponding switch:
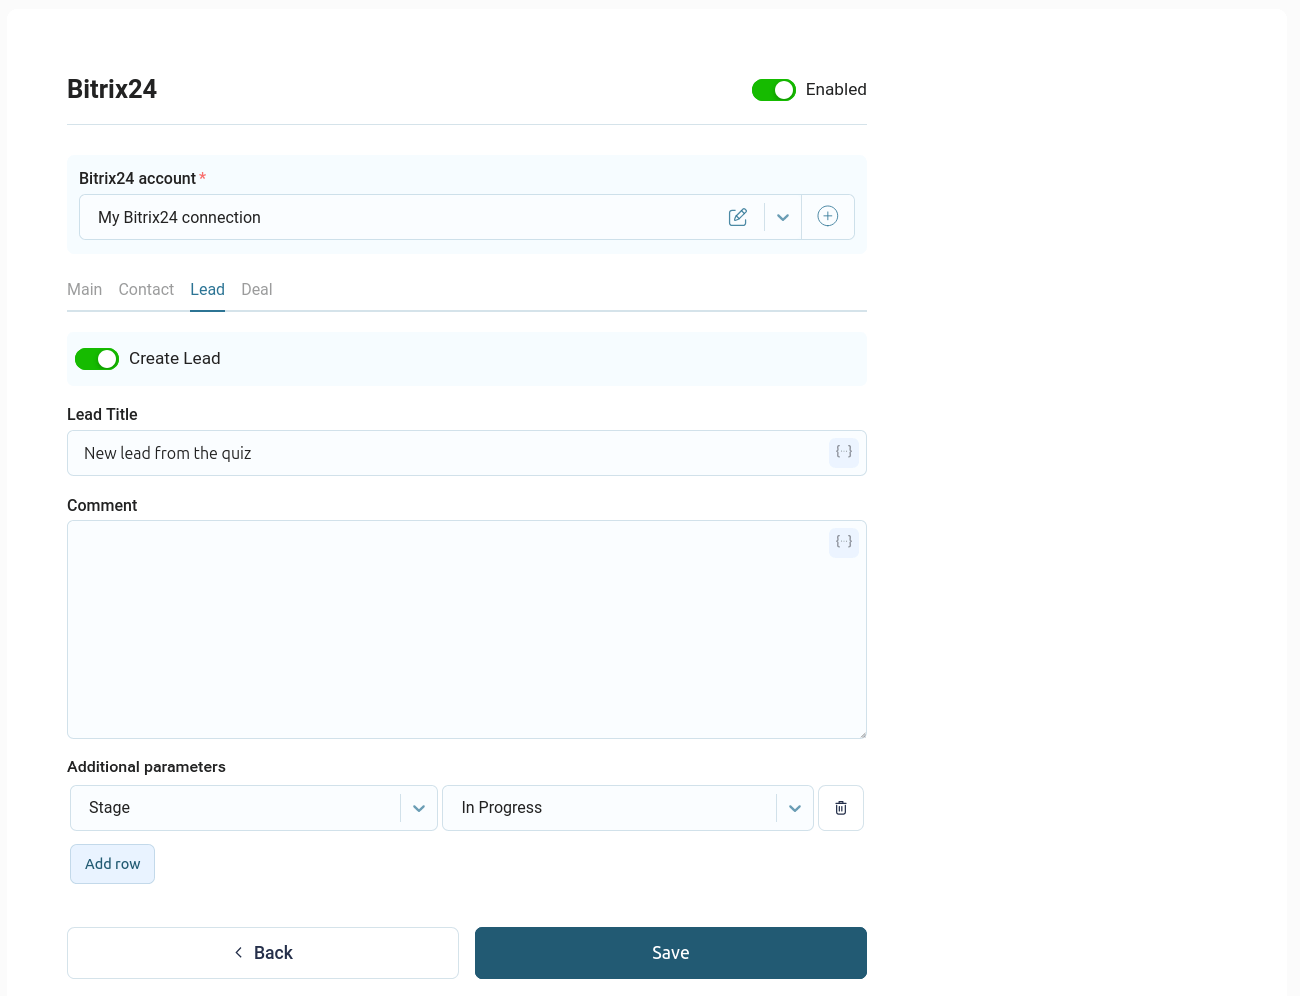
Here you can customize the lead title, comment, and any additional lead parameters available in your CRM.
Creating a deal
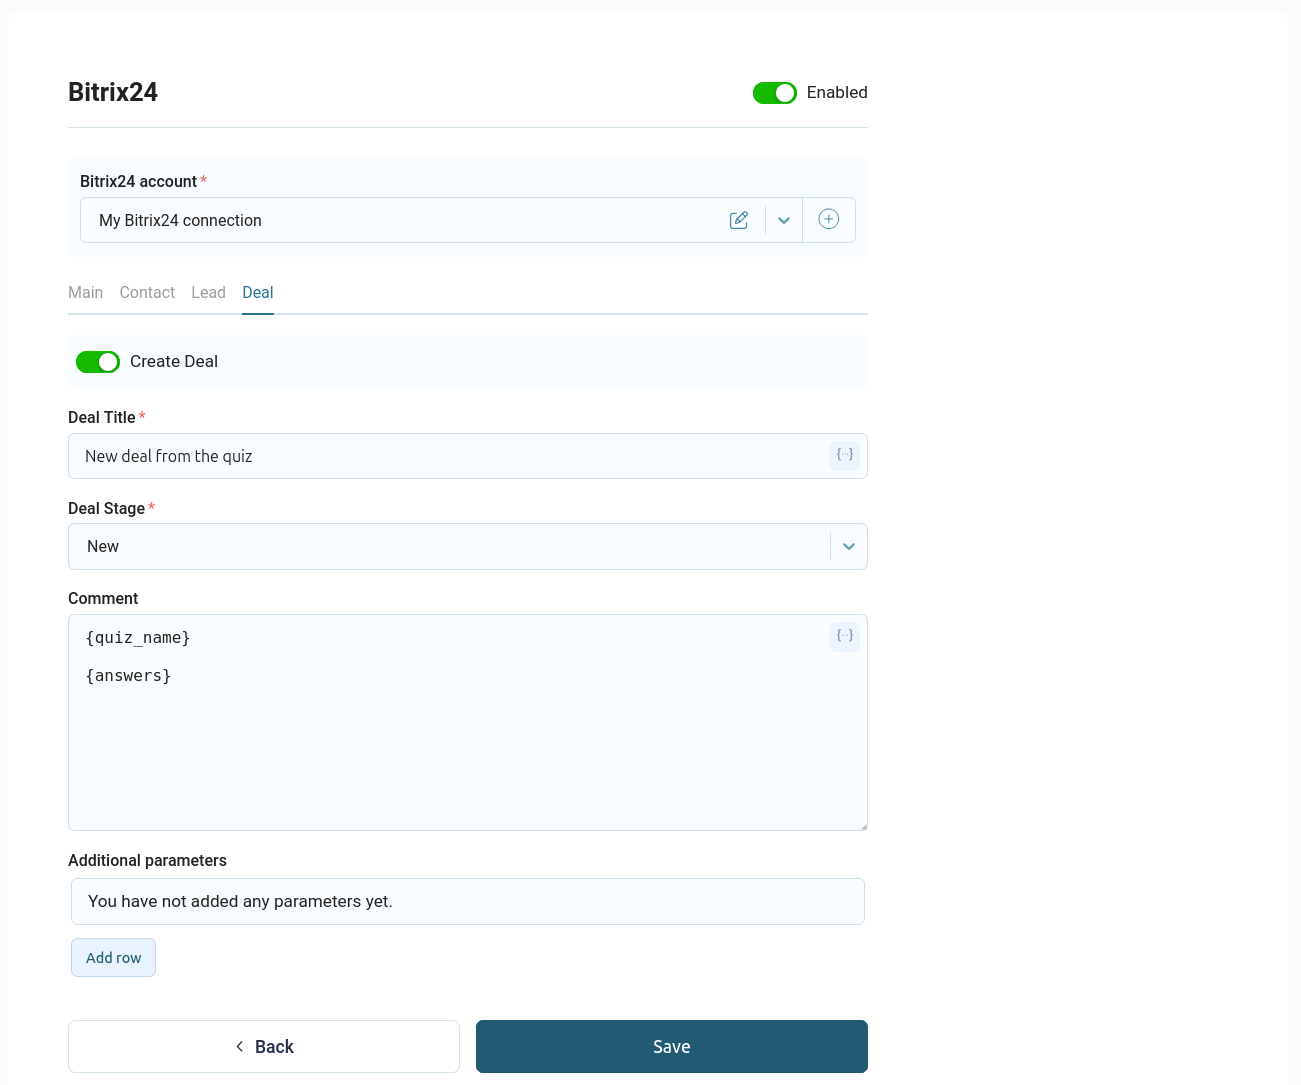
You can configure deal creation in a similar manner. To do this, go to the "Deal" section and activate the "Create Deal" toggle:
Next, you need to install the QuizLead app on your Bitrix24 portal. To do this, follow this link and follow the instructions.
Once the QuizLead app is installed on your portal, you need to set up a connection to your Bitrix24 account. To do this, click the "Create Connection" button:
Next, enter the name of your connection and the link to your Bitrix24 portal:
Click the "Connect" button, which will open a new tab and redirect you to the Bitrix24 website. Log in to your account and grant the necessary permissions to our application:
Once the necessary permissions have been obtained, the main integration options will become available to you:
This integration contains 4 sections:
- The main thing
- Contact
- Lead
- Deal
In the main settings, you need to select the responsible user, and also configure the basic contact parameters: name, email, and phone number.
Contact details
In the "Contact" section, you can configure other contact settings, as well as choose whether or not to create a separate contact when transferring data:
In the list of additional parameters, you can configure all available contact fields that you have in your CRM.
Lead generation
If you need to create a lead, go to the "Lead" section and activate the corresponding switch:
Here you can customize the lead title, comment, and any additional lead parameters available in your CRM.
Creating a deal
You can configure deal creation in a similar manner. To do this, go to the "Deal" section and activate the "Create Deal" toggle:
Here you can customize the deal name, funnel and deal stage, comments, and additional parameters available in your CRM.
Once all fields are filled in, you must click the "Save" button.