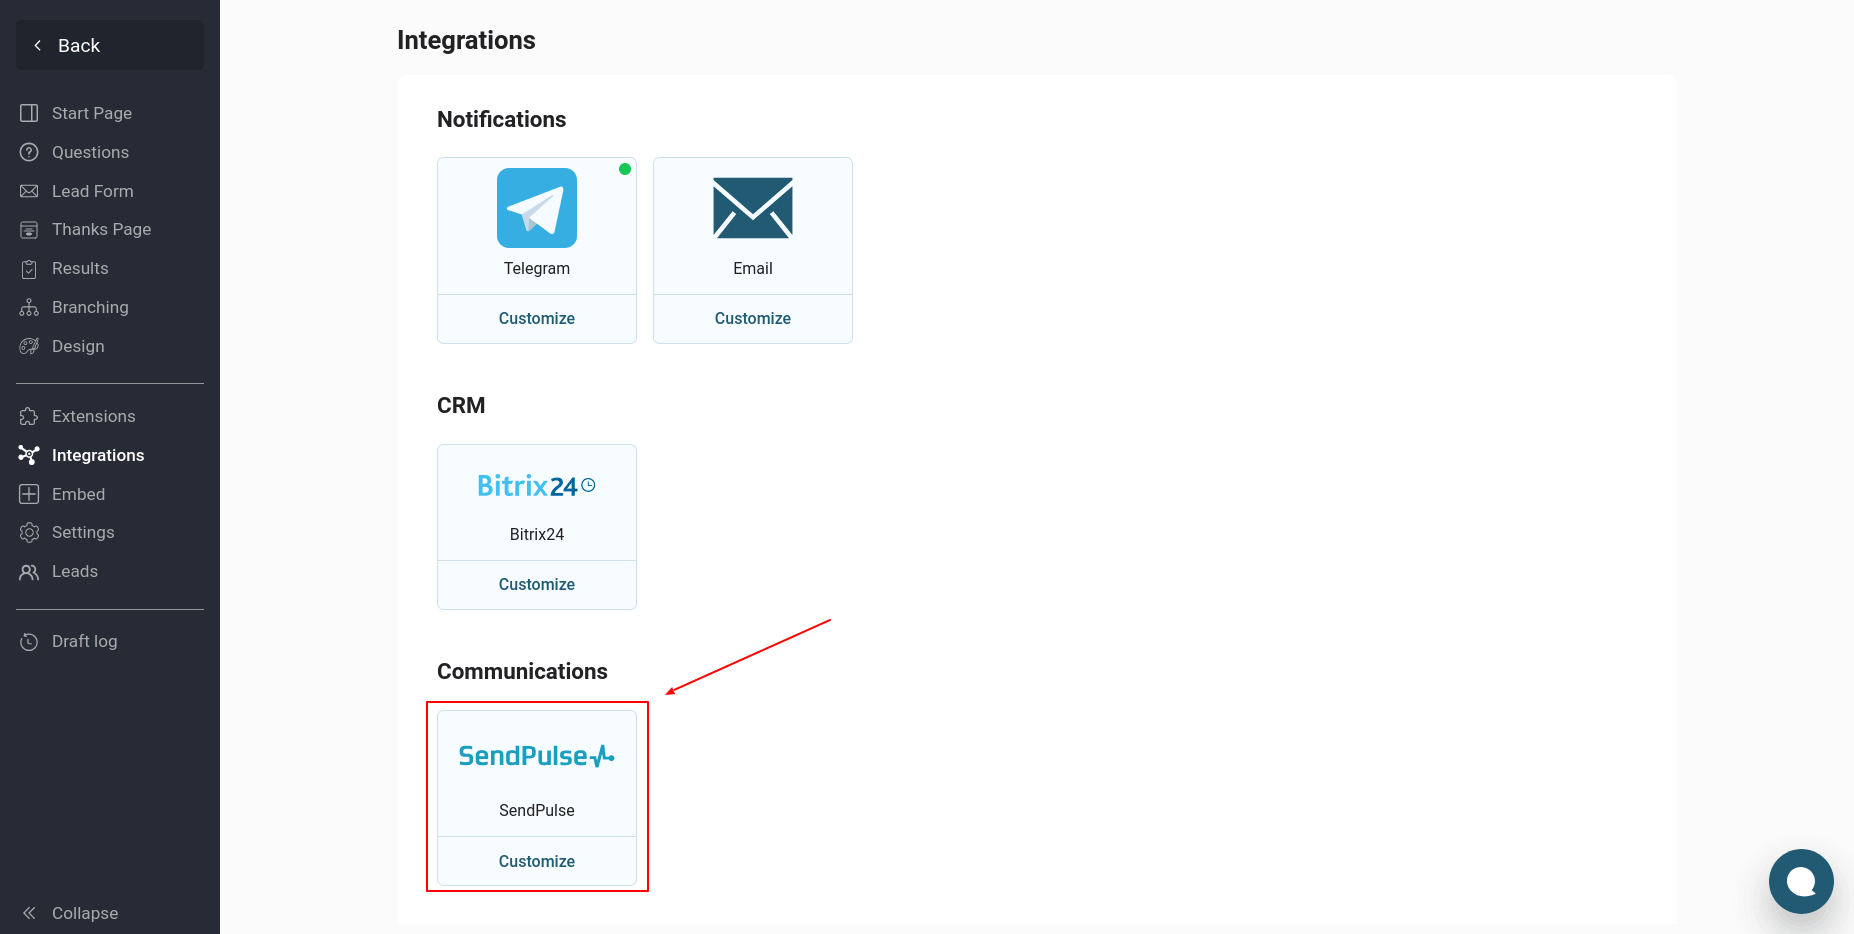
To configure a quiz integration with SendPulse, go to the "Integrations" section of the desired quiz and edit it. Find the "SendPulse" module in the list of integrations and click the "Customize" button:
If you are setting up integration with SendPulse for the first time, you will need to create a new connection:
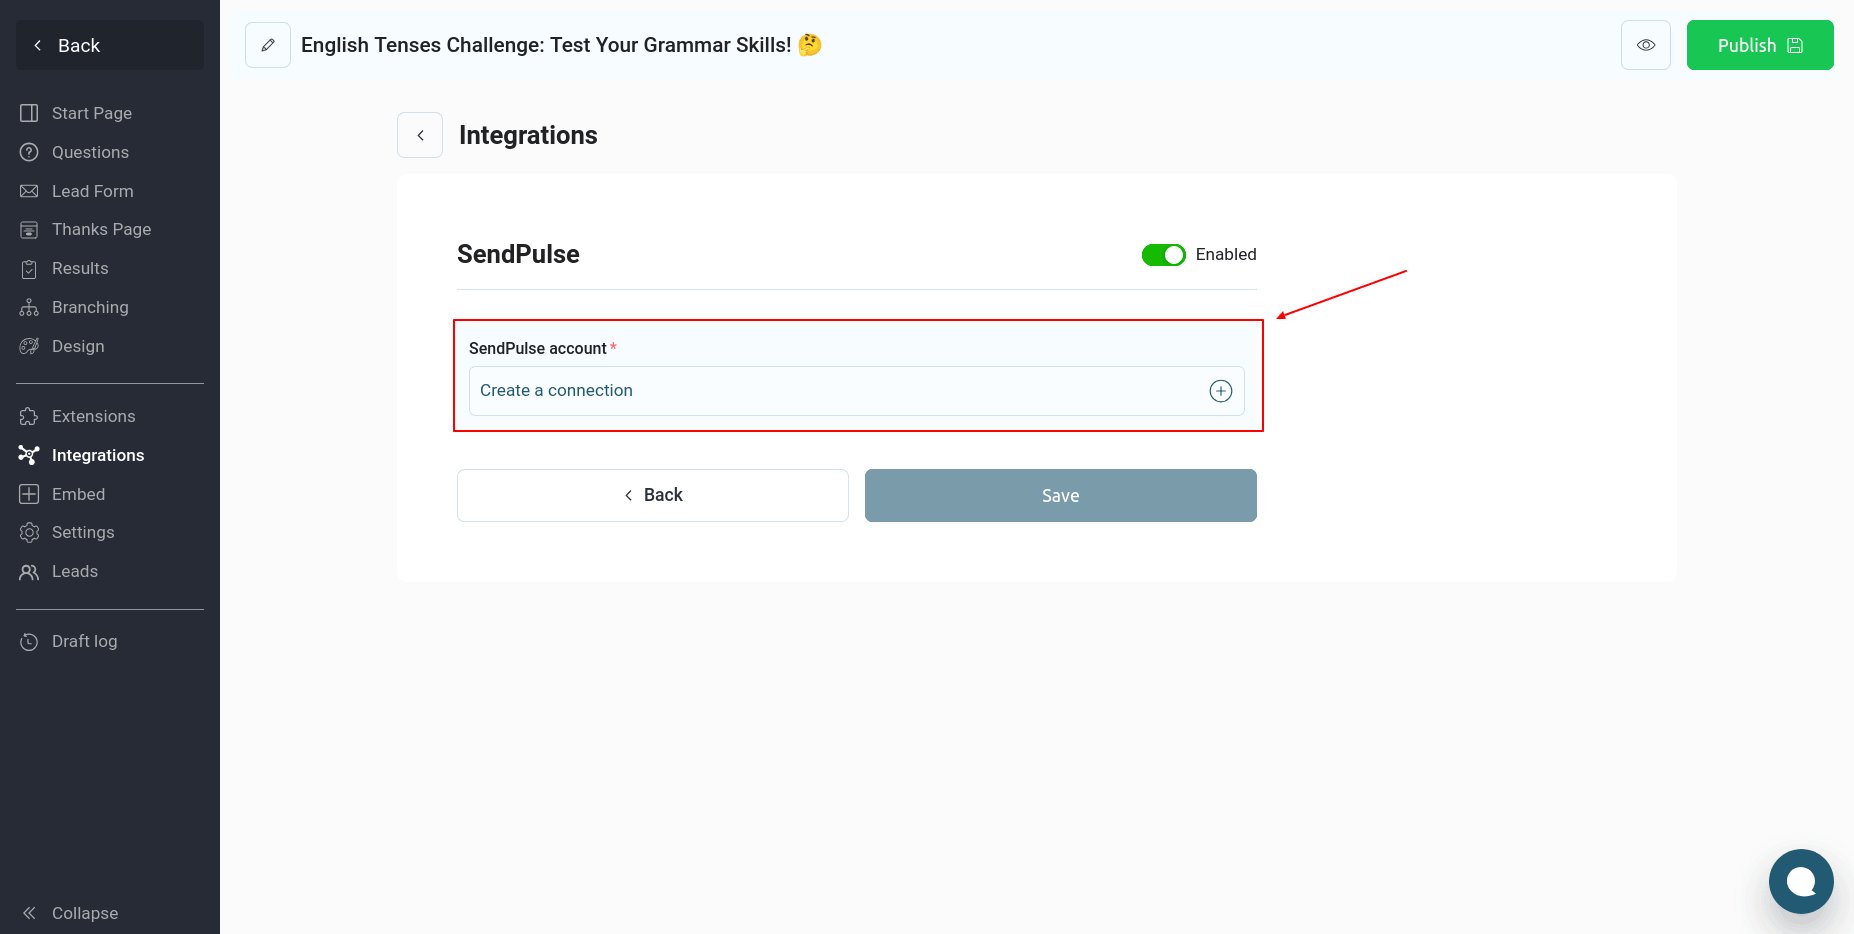
Click the "Create a connection" button:
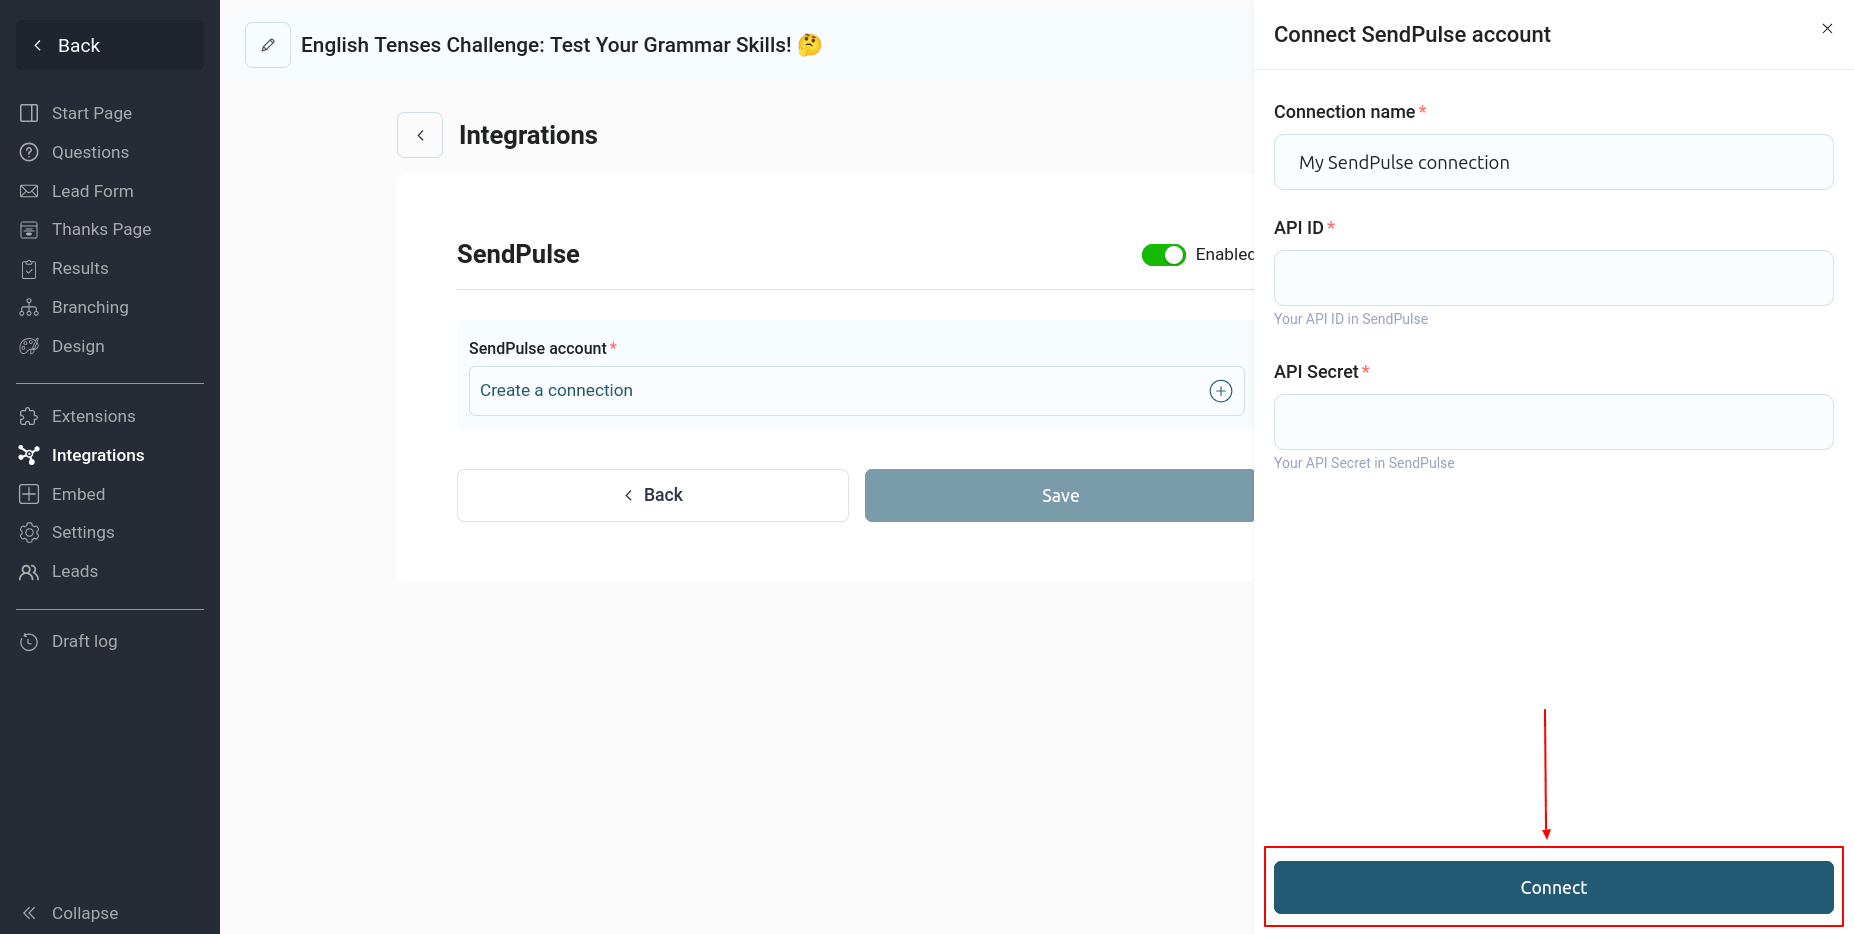
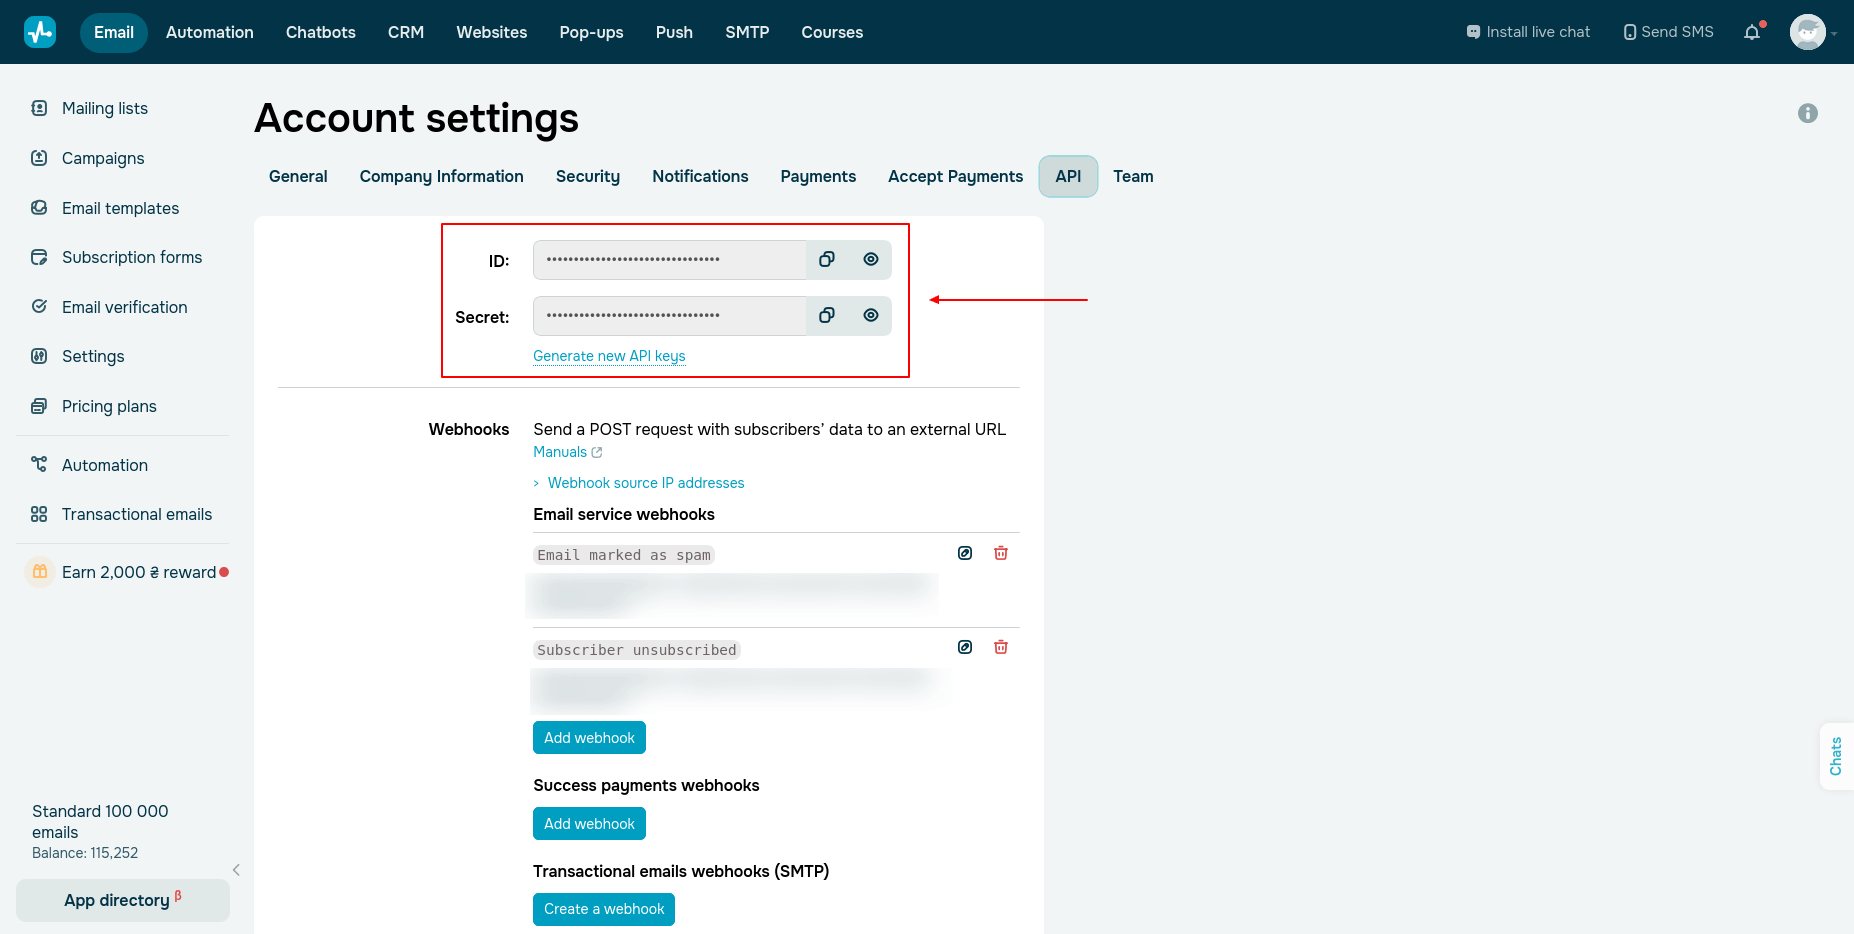
Here you need to enter your API ID and Secret. You can find these values in your SendPulse account under "Account Settings" -> "API":
Enter your API ID and Secret and click "Connect." If the information is correct, you'll see this page:
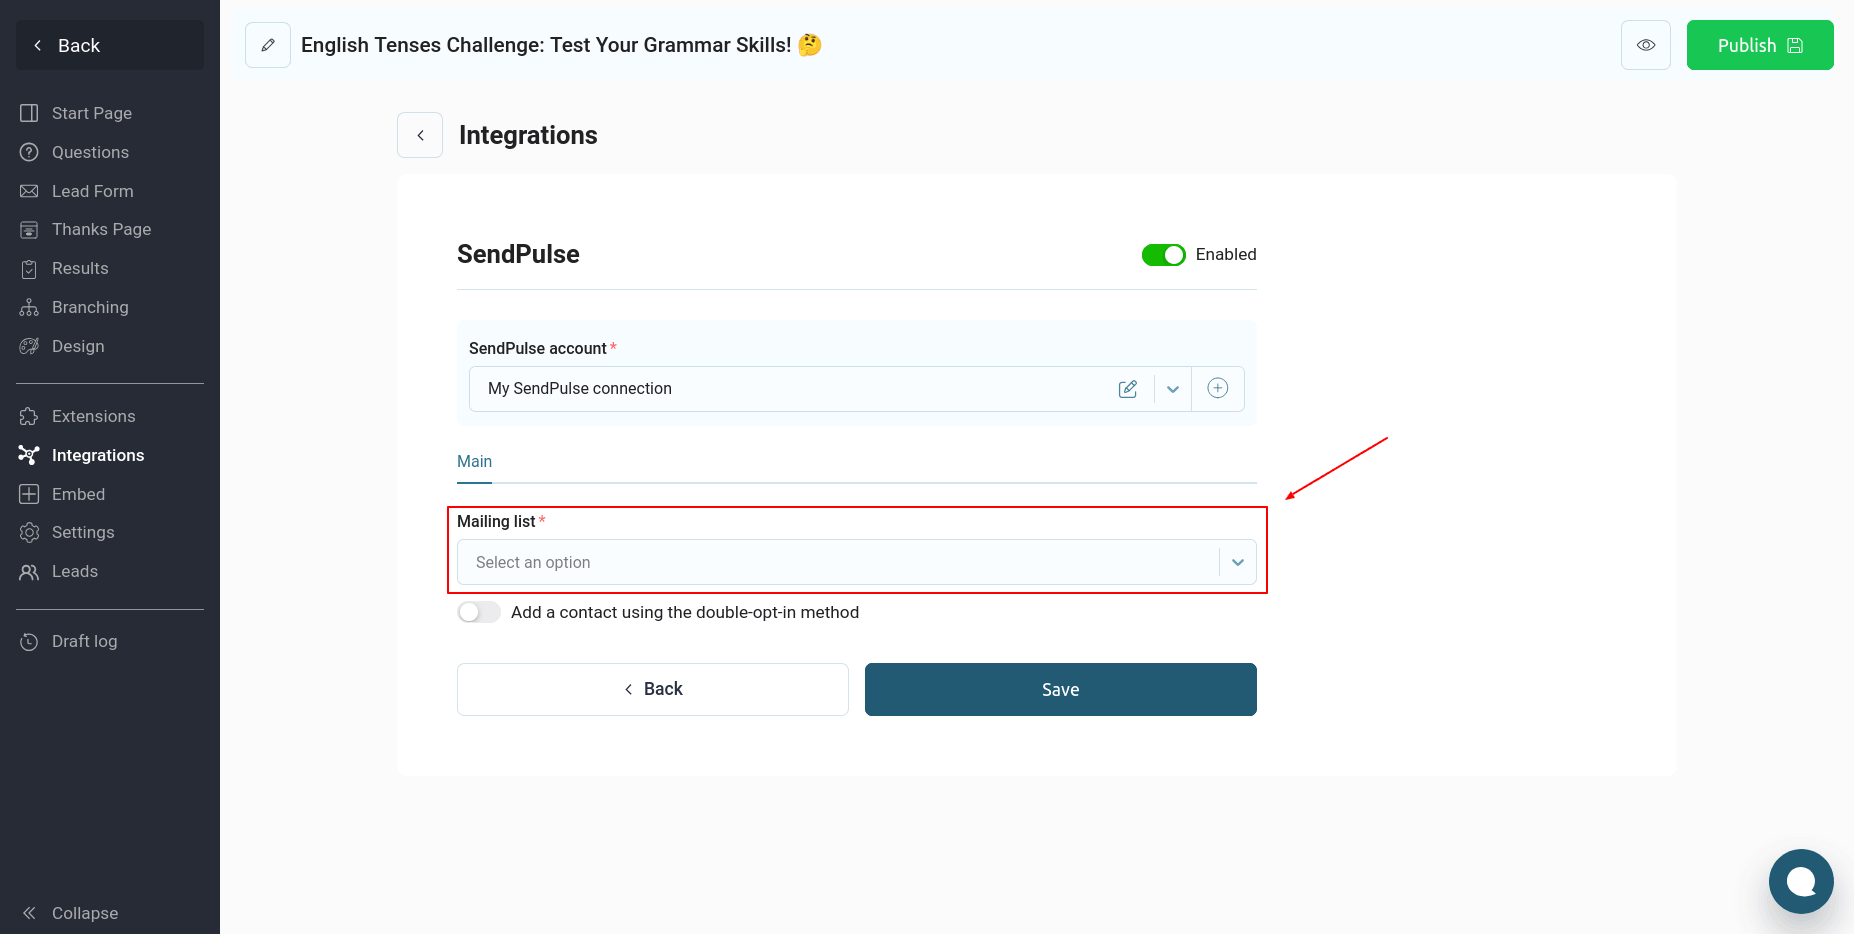
Now you need to select the mailing list to which contacts will be added after completing the quiz. If necessary, you can toggle the "Add a contact using the double-opt-in method" switch:
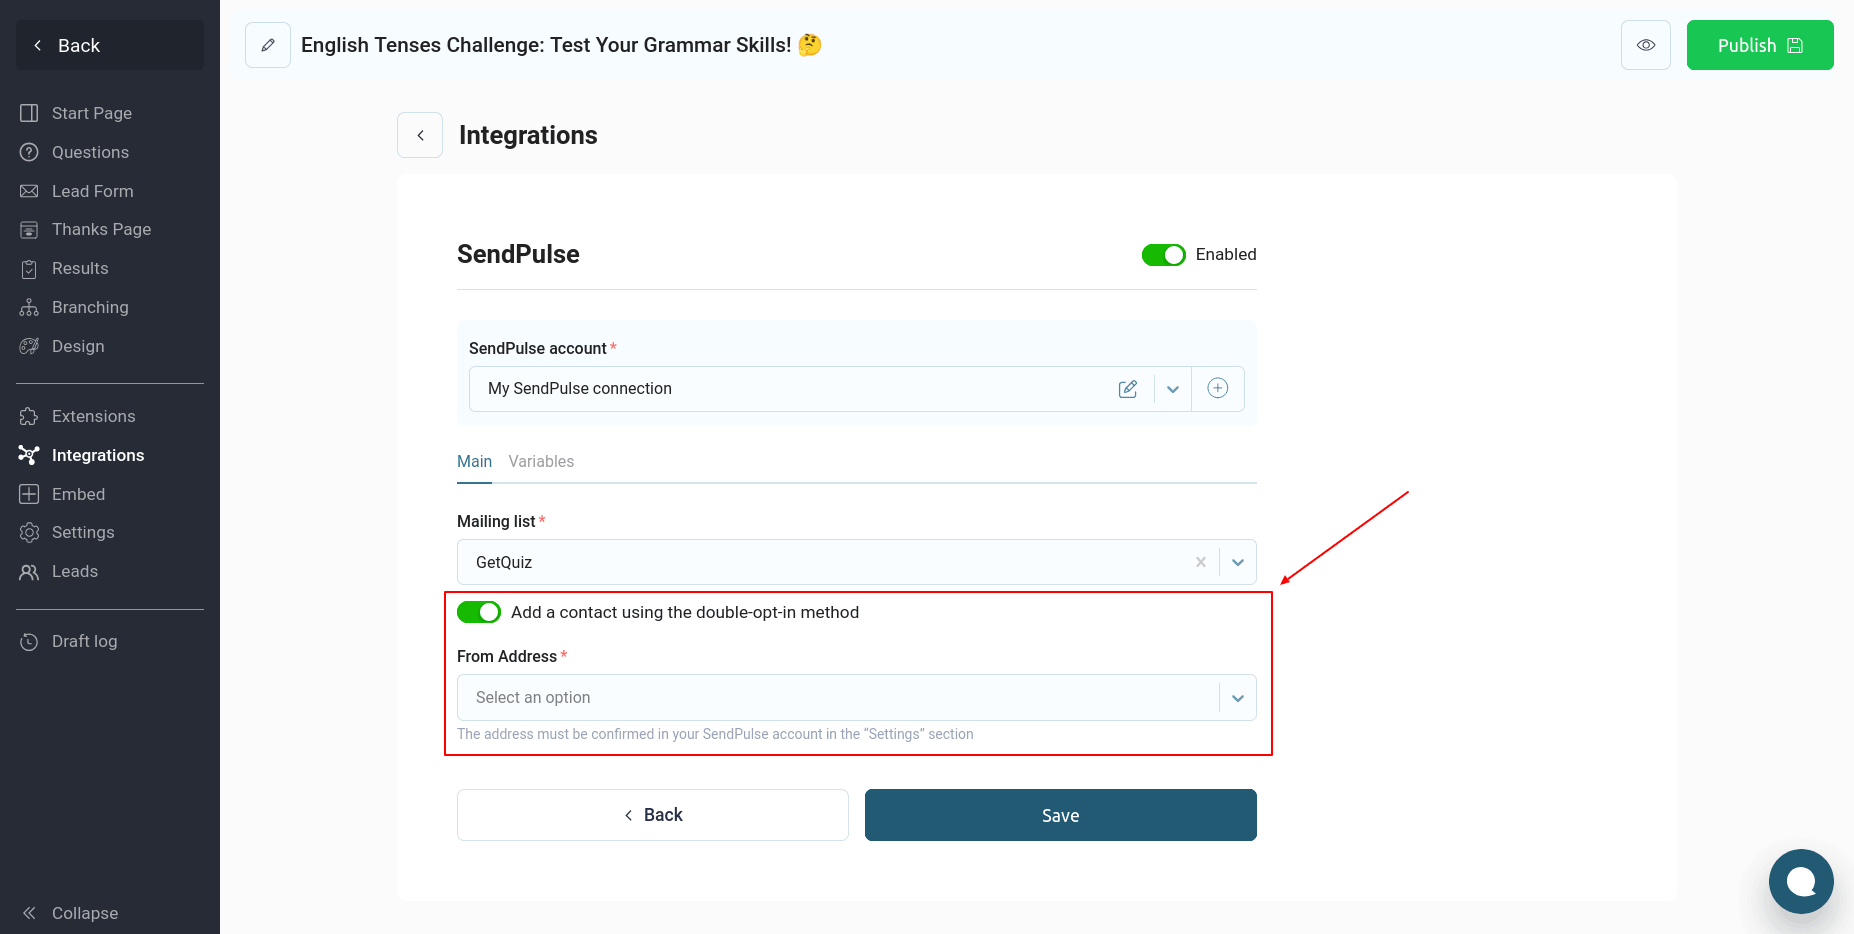
After enabling this switch, the user will be sent an email to confirm their subscription, and only after confirmation will they be added to your mailing list.
You also need to select the sender's email address from which the emails will be sent to confirm your subscription.
If you've added custom variables to your mailing list, you can also customize these data. To do this, go to the "Variables" section:
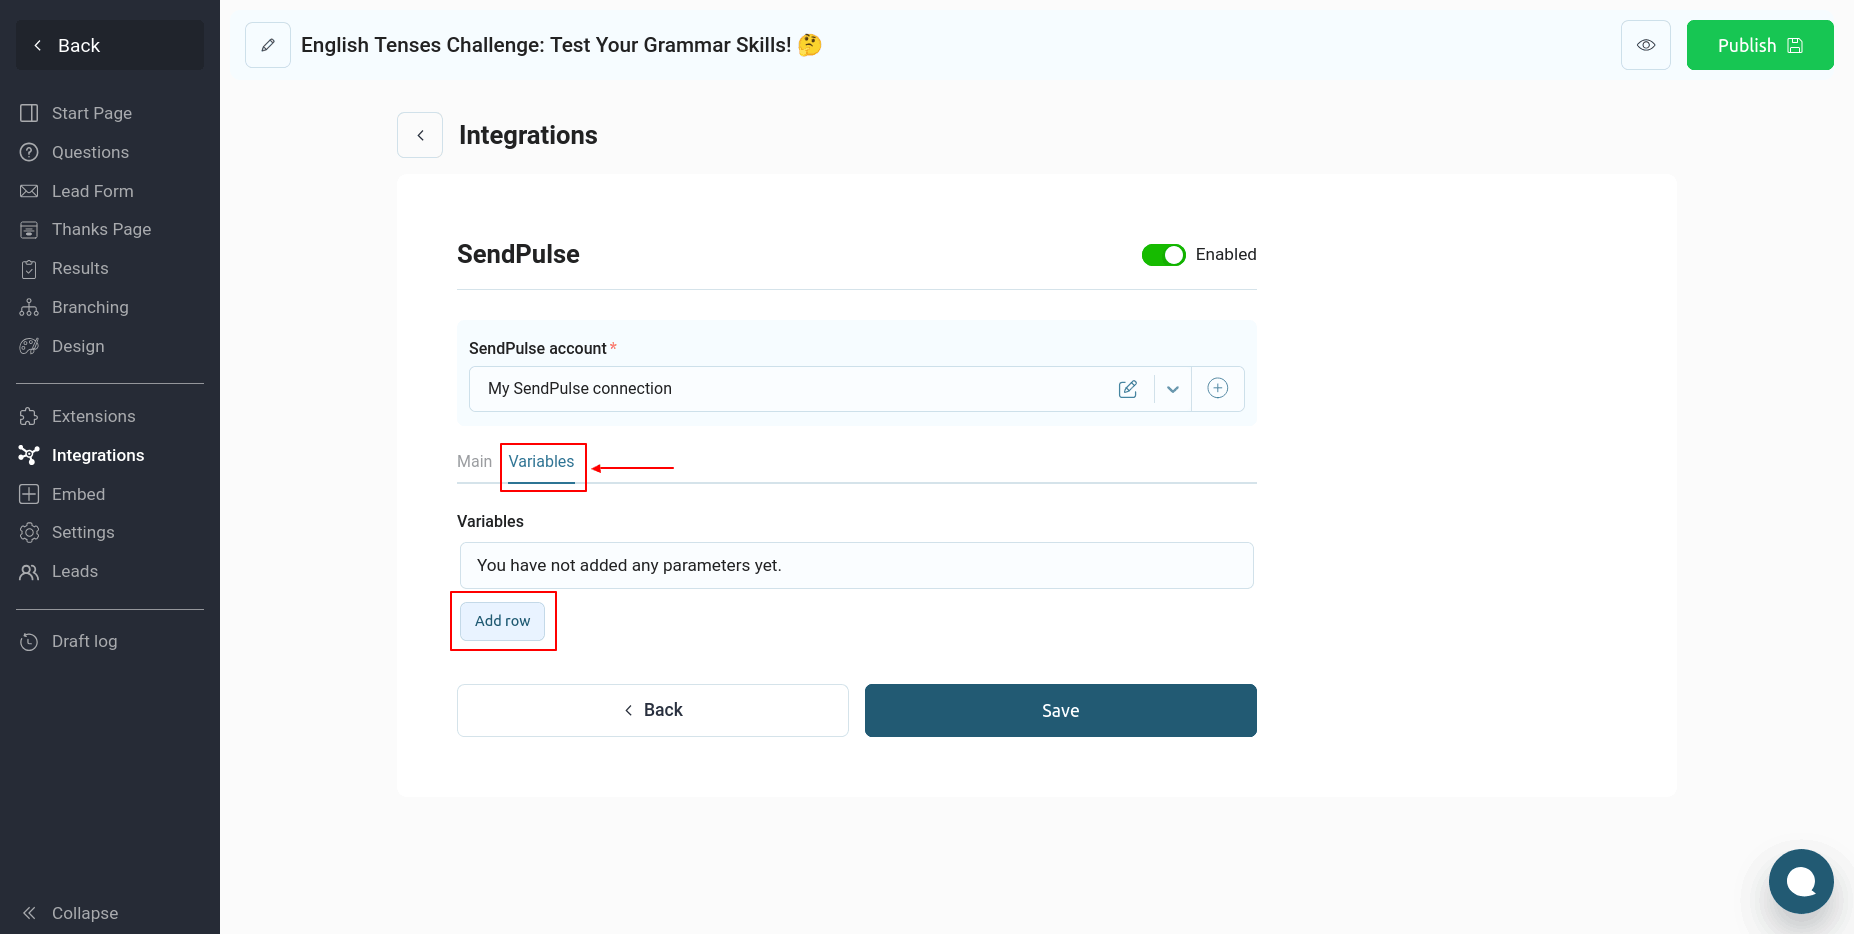
You can configure the transfer of any data from the quiz to these variables. To do this, click the "Add row" button:
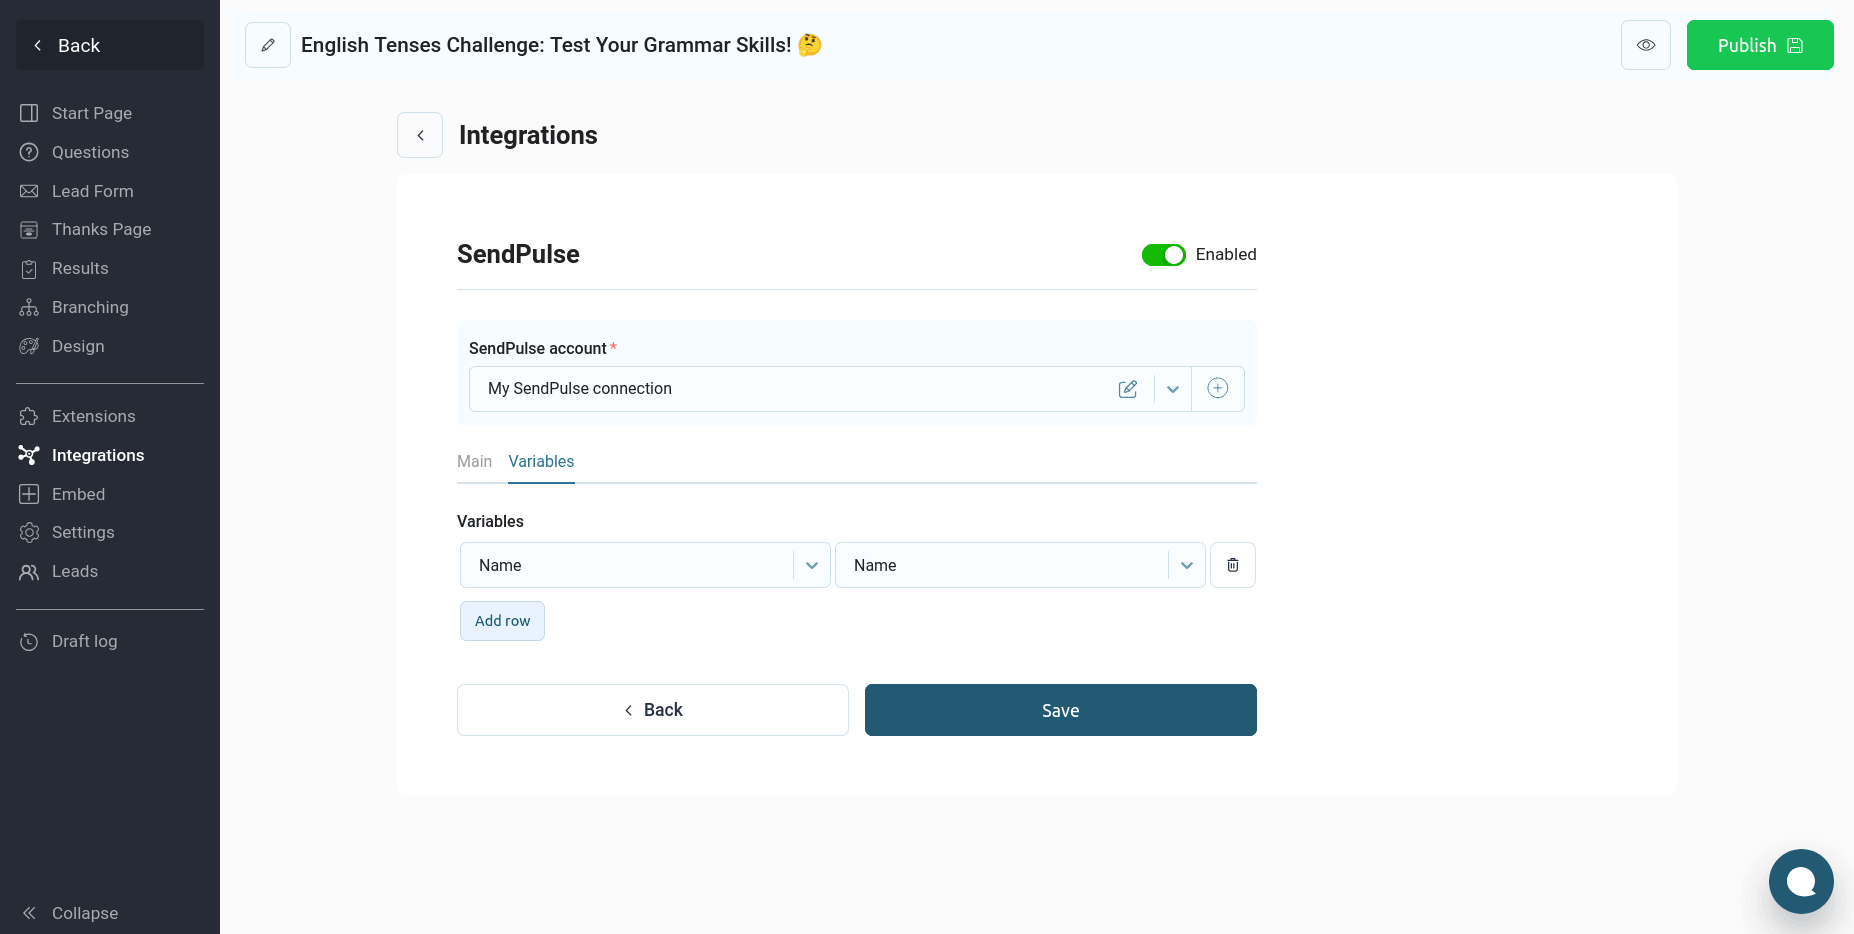
The list on the left will display all available variables from your mailing list, and on the right will display the quiz data. Configure all the required data and click "Save." This completes the quiz integration with SendPulse.
Now, every time a quiz is completed, the data from the quiz contact form will be transferred to the specified SendPulse mailing list.